Chalk Paint: Upcycling Furniture
I’m sure you’ve heard of Chalk Paint by now!? It started to blow up in popularity about 2012 with Annie Sloan’s collection and ever since, women have been upcycling everything from mug trees to wardrobes with it! It’s popular because you don’t need a primer, so you can paint on a shiny surface and finish with a wax or a lacquer to finish the job!
I’ve been toying with the idea of painting something with chalk paint but as we’re sticking to IKEA furniture until we buy our house and get the French Antique furniture we want, we don’t have much that can be ‘upcycled’ and I’m certainly not painting my Laura Ashley pieces…

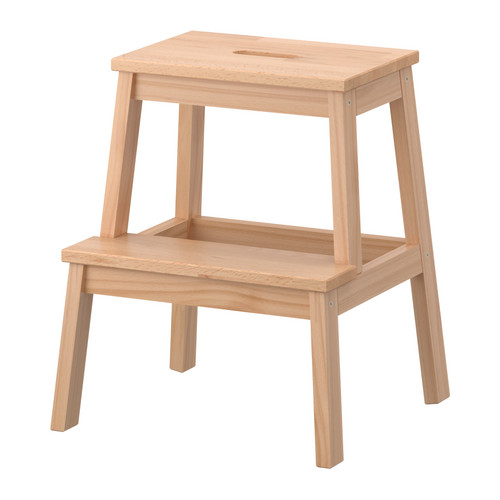
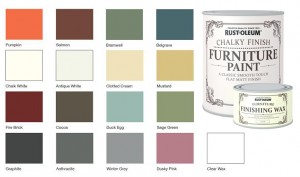
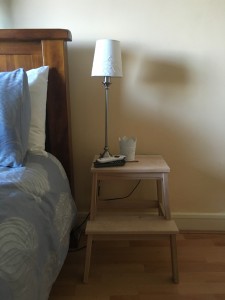
Being on a budget with every cent going into a house deposit, I’m trying to be as thrifty as possible. I bought a pair of Birch Ikea Bekvam step stools after seeing them in a magazine, being used as bedside tables. They’ve been sitting raw, unvarnished by our bed for two years…gathering dust and just looking….meh. I noticed Woodies DIY were selling a less expensive version of Annie Sloan in the form of Rustoleum Chalky Finish Furniture Paint and so I took the plunge and bought a tin of ‘Clotted Cream’ and a tin of teak woodstain for the steps.. I figured, what the heck, if I hated it, the steps were only €15 so it wouldn’t be a major loss and I could strip them back down if I wanted.. I do have a power sander but it’s in my Mum’s attic, with most of our other stuff, waiting until we buy our house… which box? God knows..
It’s really important you prepare the wood surface by cleaning it, a damp sponge pulls off any dust and simply allow it to dry. Having done this project, if I was to do it again, I’d sand the stool until it was smooth, just to take the raw edge away…the paint glides on easier that way too and you won’t get any clumps of fluff or dust in it (don’t you just HATE hair in your paint?).
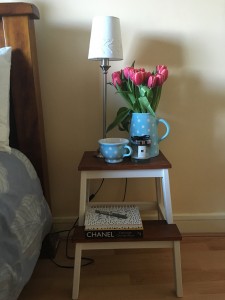
I have used Annie Sloan before, on the back of one of Mum’s cabinets to show her how easy it is to upcycle and create a masterpiece….I then stole Mums Annie Sloan brush (shh!) Moving on to Rustoleum, it may be a bit cheaper but the downside is that it oxidizes way too fast and becomes thick and gloopy, this is where you get the brushmarks. I gave my step stools two coats which required ONE tester pot for €6.99 , it’s all they needed and then used a very fine grade sandpaper to remove brushmarks, then finish with the wax OR do as I did and rub Coconut oil into it…does the same thing.
As I mentioned above, I used a teak stain on the steps, it looks like a Strawbridge/Laura Ashley ‘Bramley’ mash up and it’s a little more hardwearing. After I finished I also thought…why didn’t I stain the whole lot, then paint with the chalk paint, so that I could distress the corners of the legs and the darkened wood would show through instead of the white Birch. My bother in law suggested beating the legs with a chain to give them that well worn look..but I couldn’t do it.
I’m totally tempted to take up an Annie Sloan class in one of the many shops around the country that do workshops, like Moss Cottage in Dundrum. But it’s so easy and amazing what you can do if you have a little spare time on your hands. Would definitely invest in Annie Sloan too, Rust-Oleum just hadn’t the same quality.
What are your thoughts on ChalkPaint? Have you tried it before, did it work out???
